diy metal detector raspberry pi
Frequency adjustability between at least kHz to high hundreds of kHz or low MHz range 10kHz-10MHz is doable with relatively simple electronics nowadays. Owning a metal detector is not prohibited in my country Croatia but using it to find anything of historical values could be heavily punished.

Pin On Arduino
Surf pi 12 Metal detector Cheap metal detector Diy metal detector.
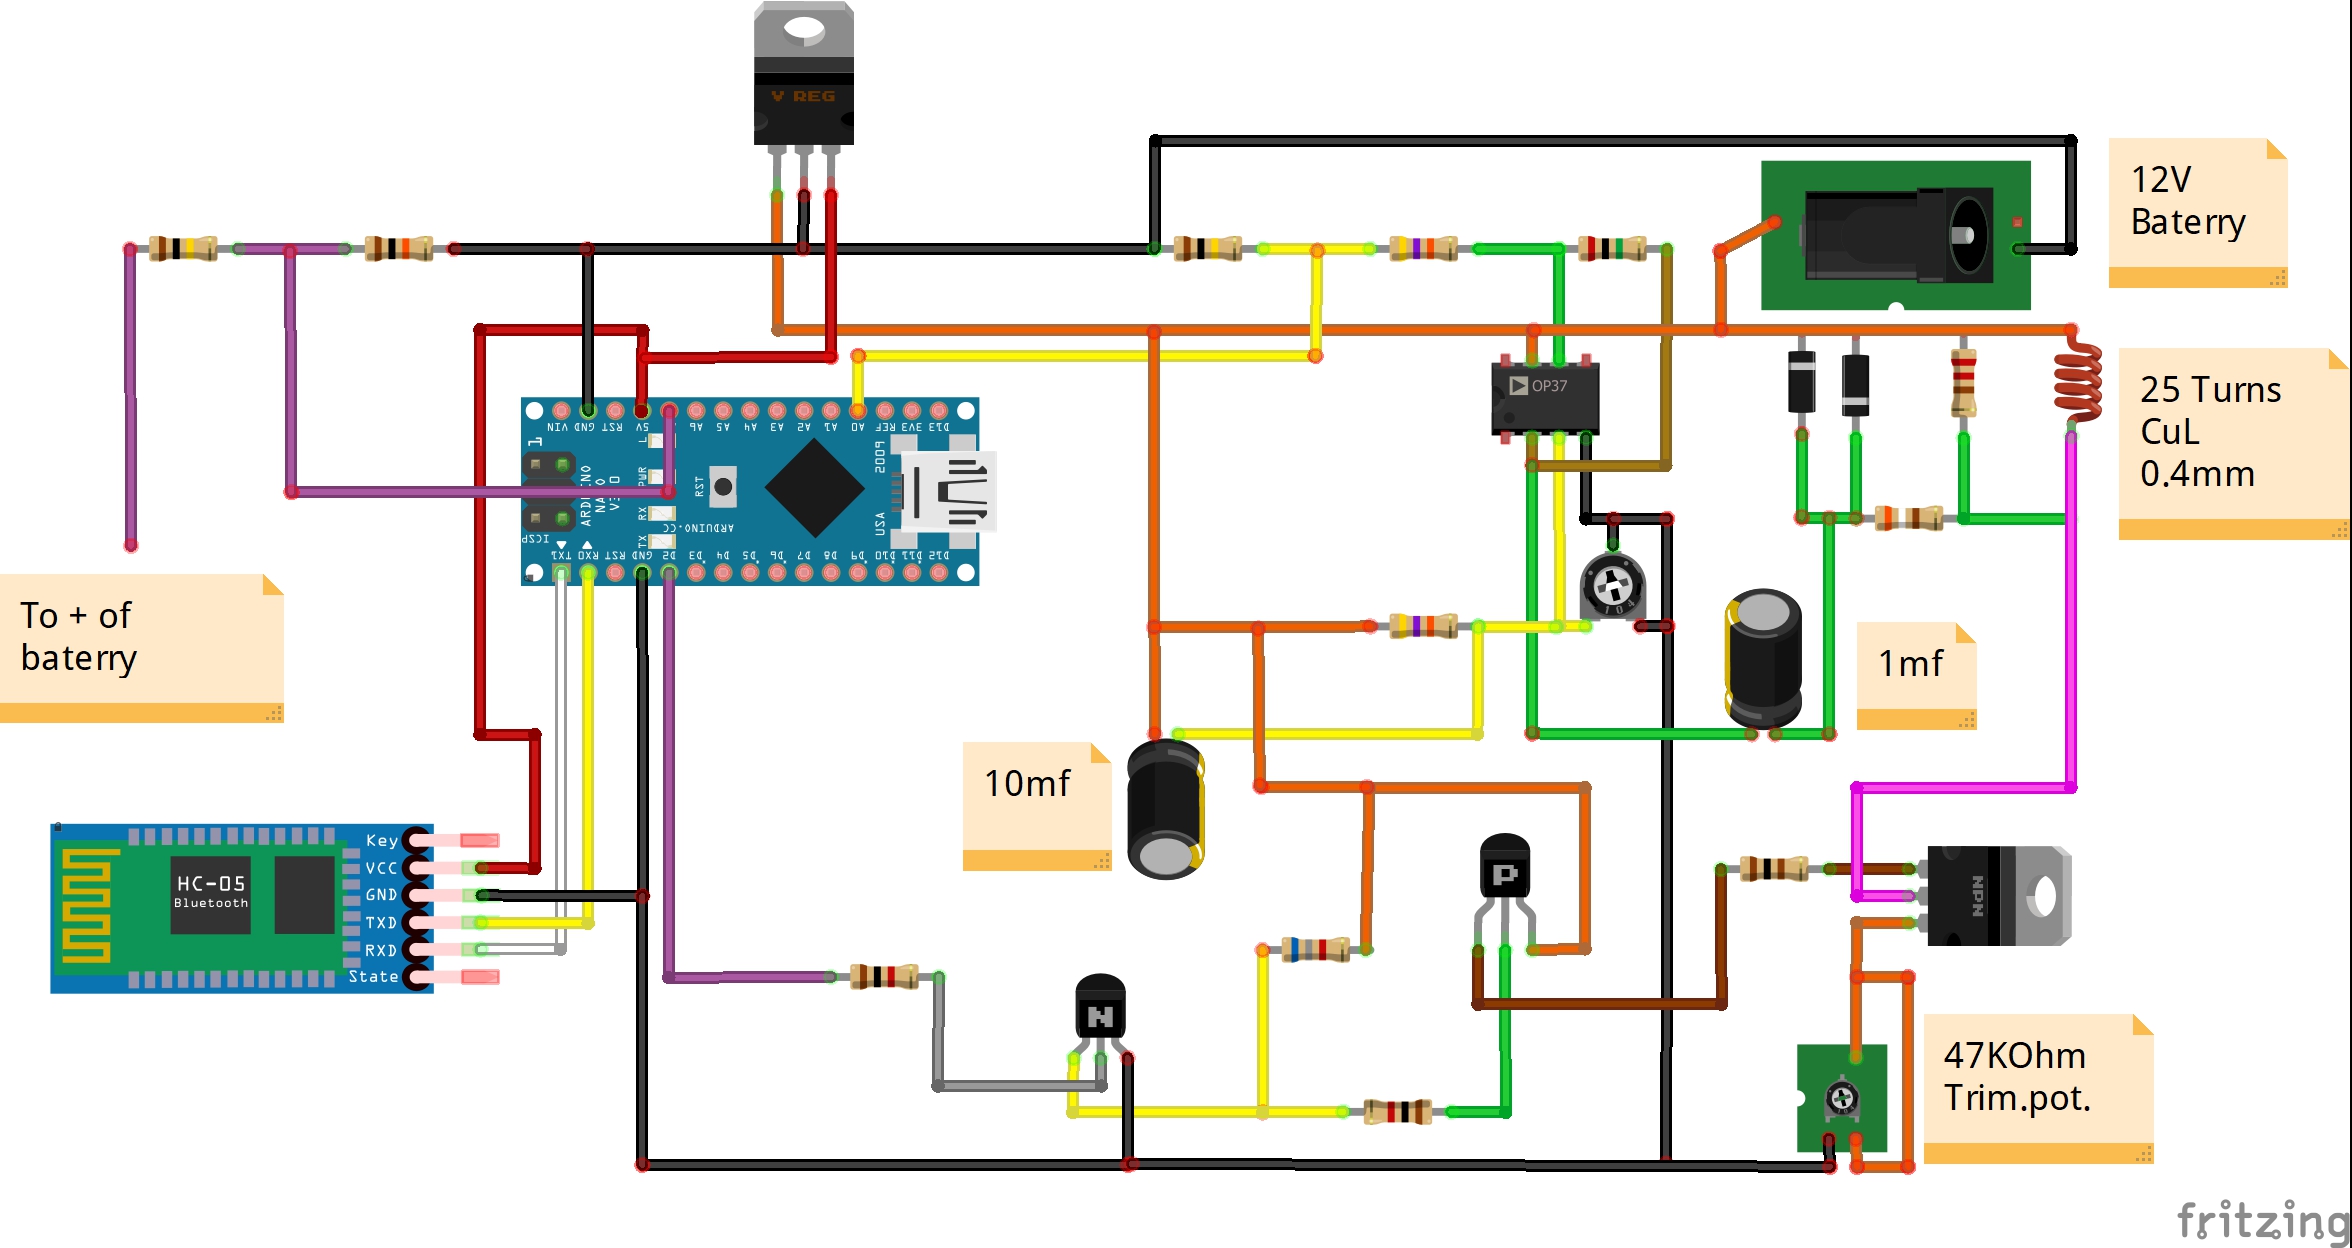
. Set up your Raspberry Pi and software. Circuit schematic breadboard diagram. Aptly called the Discoverer the robot is essentially a remote controlled car that utilizes a Raspberry Pi as its.
This one differs by using an Arduino to read from the metal detecting coil. The Arduino will store the fixed frequency and continuously compare the incoming frequency of the detector circuit with the stored frequency more on the Arduino program below. It is controlled by Raspberry Pi.
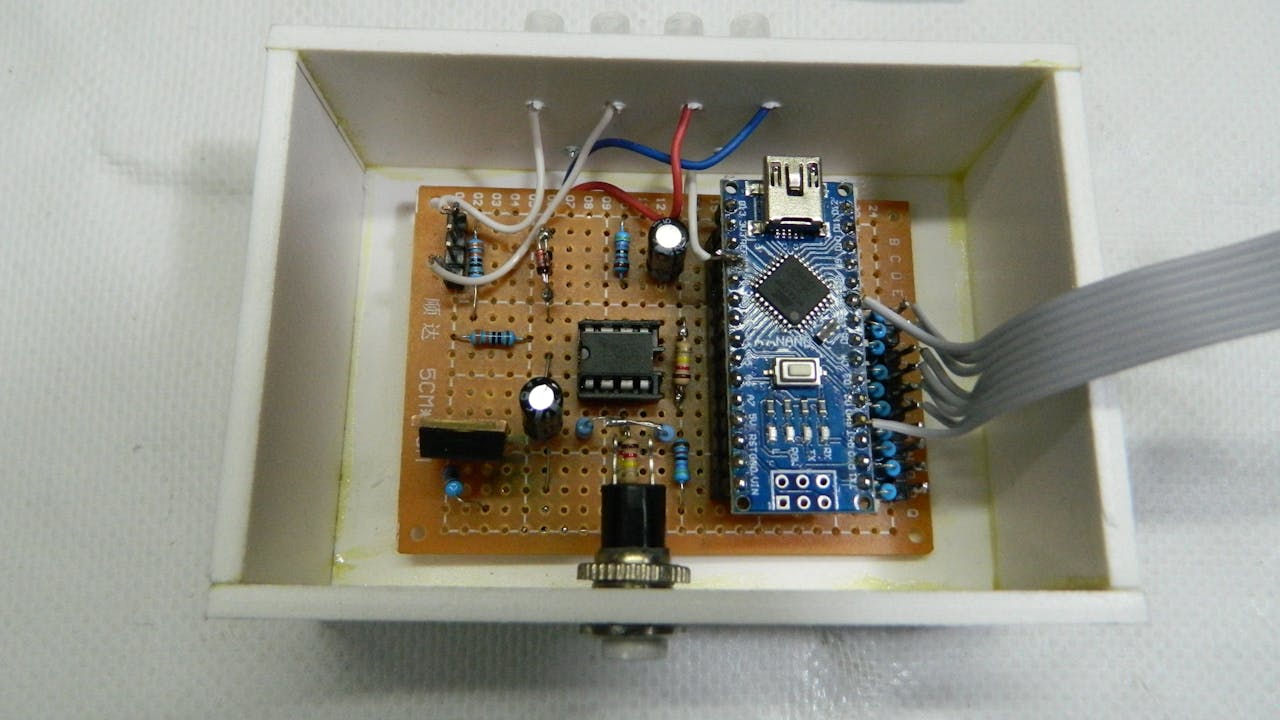
A LED and Buzzer are used as metal detection indicator. We have used an Arduino Nano for controlling whole this Metal Detector Project. When the wire coils detect a piece of metal in the ground the information is fed to an earpiece through an audio jack which rounds out.
A well-designed metal detector has. Then the buzzer will ring. Diy Metal Detector Raspberry Pi.
The instructable is divided into many steps to make sure it is super simple to follow. This DIY Raspberry Pi Robot Can Autonomously Explore its Surroundings. The transmitter circuit transmits the commands required to operate the robot.
Comments 5 Likes 7. I made this simple and at the same time amazing idea in 4 days. The is accomplished by closing the bipolar power transistor or MOSFET that connects the coil with the power supply.
For this project a toy weed-whacker was chosen to house all the components. L μο N2 A l. He then came across the Garys Pulse-AV metal detector.
Before you begin download the RMS disk image a copy of the operating system OS from the link above. A 2N3904 transistor is connected at the output of this IC to drive the piezo buzzer and the Led. And the result impressed me.
Easy to solder Easy to make BMC64 is a bare metal fork of VICEs C64 emulator optimized for the Raspberry Pi. Move over NeoPixels theres a new LED strip in townThese fancy new DotStar LED strips are a great upgrade for people who have loved and used NeoPixel strips for a few years but want something even better. Where L- Inductance in Henries.
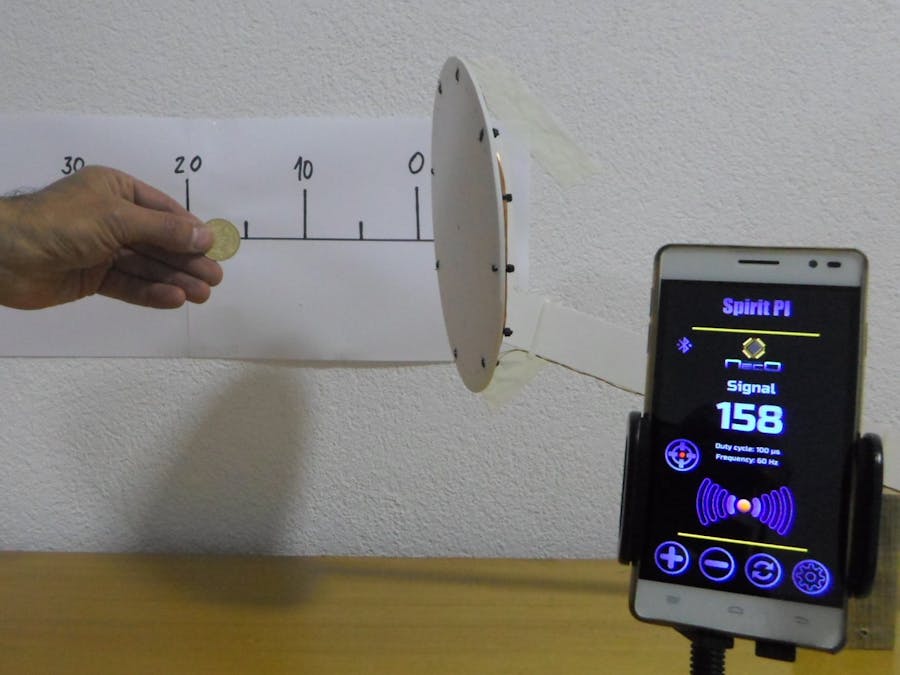
Making the circuit on a breadboard. A signal diode is also used for reducing the voltage. Diy sensitive vlf metal detector with smartphone detects a small metal coin at 25 cm and pot lid at 1m distance.
Ill need to think if I will make this detector. So creating a small voltage between the pins of the piezo bus. This is the easiest metal detector project The unit of Inductance is Henry and the equation to quantify the Inductance is.
Adafruit DotStar Digital LED Strip Black 144 LEDm One Meter BLACK. N- Number of turns. From Arduino and ATMega controllers through to the Raspberry Pi and ARM based system on a chip.
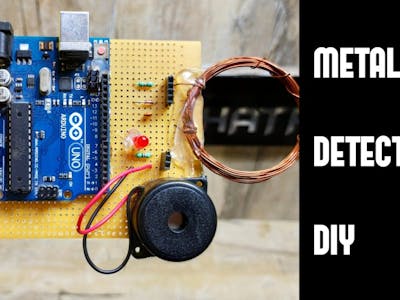
DIY Arduino Based Metal Detector Me and my son decided to go treasure hunting with a metal detector that we have but we couldnt find it anywhere. Featured Adafruit Products. Now lets build a metal detector using a proximity sensor that can sense ferrous and non-ferrous objects by using both inductive and capacitive proximity sensors.
This Raspberry Pi robot created by Munich-based Ingmar Stapel is designed to autonomously make its way through a certain area and operate as a metal detector. After detecting a metal it sends an input signal to the op-amp IC. It has 50hz60hz.
And a resistor for limiting the current to the Arduino pin. This sensors output is a fixed voltage signal. You can build a metal detector which is highly accurate and is amongst the few that doesnt require an oscilloscope.
μο- Permeability its 4π10 -7 for Air. I found another 3d printed DIY metal detector project developed by Paulo Bubolz from Brazil. In this project we are going to use a coil and capacitor which will be responsible for the detection of.
With support from Gary I was able connect the metal detector to the Raspberry Pi and to get everything working. The capacitive sensors output is connected. The discharge graph of.
Read Our In-Depth Guide Now. DIY Metal Detector Made With Arduino. After some modifications and extensions I made the first outdoor test with the Discoverer and the metal detectorThis is my blog.
The detection cycle of pulse induction metal detectors starts right after the magnetic field has been turned of. It uses the Raspberry Pi Meteor Station RMS software which is free to download from the Global Meteor Network zip. Being proper makers we decided that it would Due to high demand expect some shipping delays at this time - orders may not ship for up to 2-3 business days.
Making the circuit on a perfboard. Well now we will connect the devices included here step by step. Our Research Has Helped Over 200 Million People To Find The Best Products.
Ad Looking for the Best Metal Detector on the Market. The high-endness of your metal detector depends almost completely on how well you design the analog circuitry. It includes the following features.
Nov 30 2016 - by Adam Rogers. A- Inner Core Area πr 2 in m 2 l-. The circuit starts with an oscillator that produces a signal of about 160 kHz which is constantly measured by the.
Materials for your DIY Metal Detector. At first Ingmar tried using a cheap electric-cable detector from a DIY store but its coil was too small to detect metal in the ground. The inductive sensor is connected to Arduino UNOs digital pin8.
When Geekphysical couldnt find his metal detector when he wanted to go treasure hunting with his son he decide to make his own. A Coil and capacitor is used for the detection of metals. A coil is used to sense the presence of any metal around the circuit.
Maybe in the future. Length of the Coil in meters. How to make a powerful metal detector at home.
The proposed system consists of Raspberry pi to which robot is connected transmitter is the remote webpage through which we can control our metal detector robot and receiver is the raspberry pi which receive the signal from the cloud and act accordingly. This circuit is working on the basis of a BiMOS operational amplifier IC CA3140 and can be operated at 9-12V. The steps are divided in the following order.
Through this metal detection kit we can identify metal parts at a distance of 30mm 60mm. The system we are setting up runs on a Raspberry Pi and uses a cheap security camera module. Also we need to give a voltage of 3 to 5 volts to this module.
Diy Arduino Based Pulse Induction Metal Detector Arduino Project Hub

Diy Arduino Metal Detector Spirit Pi 4 Pro Part 3 Youtube
Pulse Induction Metal Detector With Greenpak 5 Steps Instructables
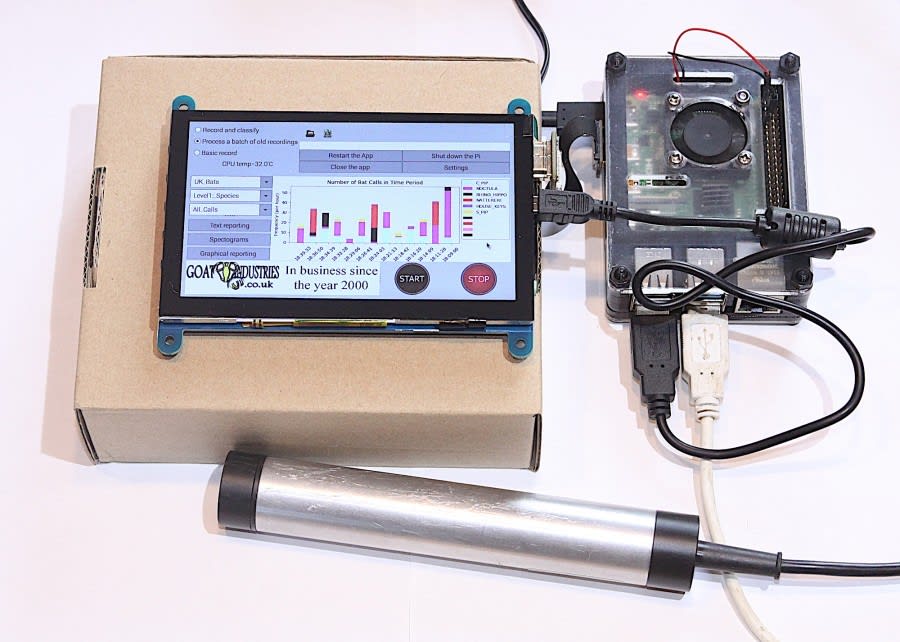
Designing A Raspberry Pi Based Intelligent Ultrasonic Bat Detector App

Surf Pi 1 2 Metal Detector Share Project Pcbway

Diy Arduino Metal Detector Spirit Pi 4 Pro A With Lcd Screen Part 2 Youtube

Arduino Based Pulse Induction Detector Lc Trap 3 Steps Instructables

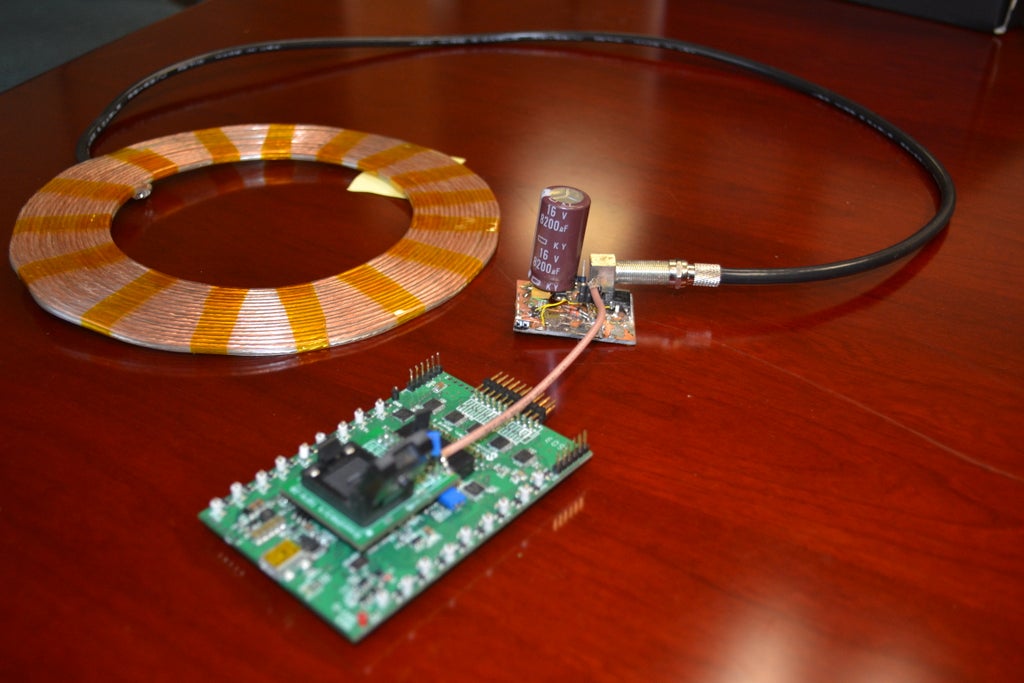
Home Made Surf Pi Pulse Induction Metal Detector

19 Diy Metal Detector Plans Free Mymydiy Inspiring Diy Projects

Diy Arduino Metal Detector Spirit Pi 4 Pro Part 3 Youtube
Diy Simple Sensitive Metal Detector Arduino Project Hub
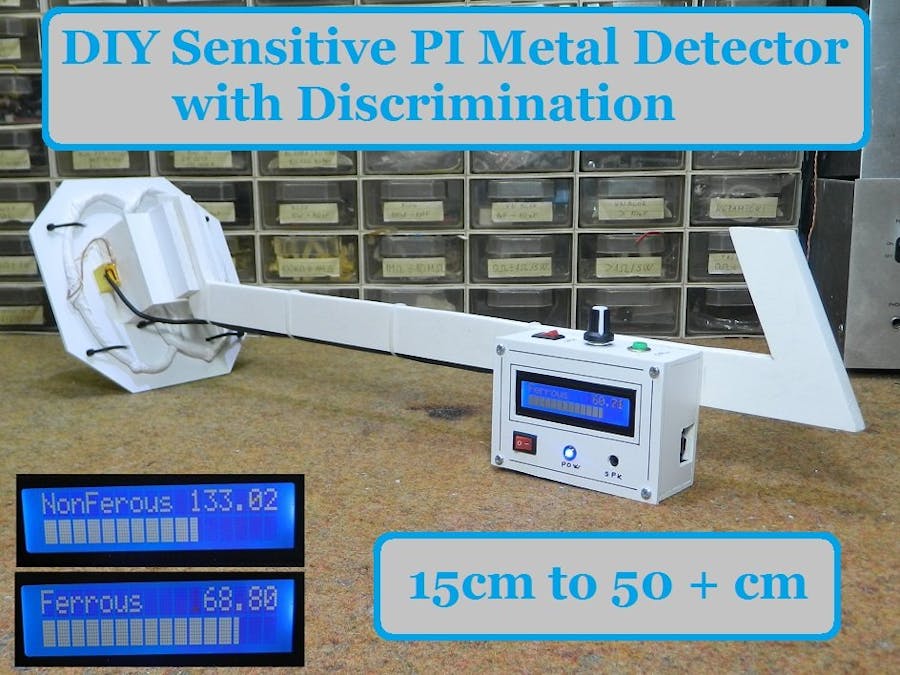
Diy Sensitive Arduino Ib Metal Detector With Discrimination Arduino Project Hub

Diy Arduino Metal Detector Spirit Pi 4 Pro Part 3 Youtube
Diy Metal Detector Using Arduino Step By Step Arduino Project Hub

Attiny13 Pi Metal Detector Lukasz Podkalicki

Deepest Pi Metal Detector Coil
/i/42304/products/2018-03-09T08%3A45%3A11.053Z-MetalDetector_1.jpg?1606306133)
Non Contact Metal Detector Sensor Kit 12556 From Icstation On Tindie
Diy Arduino Based Pulse Induction Metal Detector Arduino Project Hub

Metal Detection Hackster Io